Kippo features
A few months ago I could get access to a SSH Honeypot called Kippo. Kippo is designed to log SSH brute force attacks and the entire shell interaction performed by an attacker when the attack is successful.
The main features of this software are:
- To record the usernames and password which the attacker is trying to perform a brute-force attack.
- To create a valid username/password like "root/root" to offer the attacker a fake filesystem (resembling a Debian 5.0) with the ability to add or remove files and save the command executed by the attacker.
- To save suspicious files downloaded (via wget) by the attacker.
- Possibility of adding a /etc/passwd file so the attacker can 'cat' it.
Installing Kali Linux in a Raspberry-PI
![]()
I decided to install Kippo at home. A HoneyNet should be available 24x7x365 because the longer it is available, the more events will be captured.
You already know that a Raspberry-PI is really cheap (around 50$ all included) and it has a lower power consumption. Because of that I will show you how to install it on your device.
Currently, Kali Linux is available for Raspberry-PI. I think is a good idea to install our HoneyNet on it. We will have the opportunity to use all tools hosted in this distribution at the same time our Kippo is running.
You can download Kali Linux for Raspberry-PI here:
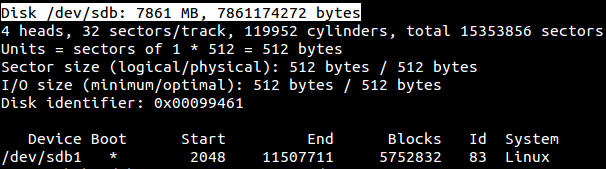
kali-linux-1.0.5-armel-rpi.img.xzTo install the Kali Linux version connect the SD card to your computer. In my case I have a 8gb SD card and I can detect where it is mounted by using the command below.
sudo fdisk -l
When you already know where your SD card is mounted, execute this command to copy Kali Linux to the card and wait for a while (the time estimated to copy it will depend on how speedy your card is).
sudo dd if=kali-linux-1.0.5-armel-rpi.img of=/dev/sdb bs=512k
How to install Kippo
We won't only install Kippo, we will also install a MySQL database to save the events and Kippo-Graph to look at these events in a Web interface.
Please, follow the next steps to install Kippo.
sudo apt-get install subversion python-twisted python-mysqldb apache2
1. Install MySQL
root@kali:/# apt-get install mysql-server
root@kali:/# apt-get install mysql-client
2. Allow to MySQL to accept connections. Edit the file below:
root@kali:/# vim /etc/mysql/my.cnf
And set a "#" to this line:
#bind-address = 127.0.0.1
3. Restart MySQL to apply the changes
root@kali:/# /etc/init.d/mysql restart
4. Create the database and a user named Kippo with all privileges.
root@kali:/# mysql -h localhost -u root -p
mysql> create database kippo;
mysql> GRANT ALL ON kippo.* TO 'kippo'@'localhost' IDENTIFIED BY 'Kippo-password';
exit
5. Download Kippo from
http://kippo.googlecode.com/files/kippo-0.8.tar.gz and uncompress it at /usr/local/src/.
6. Create the tables using the user just created.
root@kali:/# cd /usr/local/src/kippo-0.8/doc/sql/
mysql> mysql -u kippo -p
mysql> use kippo;
mysql> source mysql.sql;
mysql> show tables;
exit
6. Add to kippo.cfg the lines bellow.
[database_mysql]
host = localhost
database = kippo
username = kippo
password = Kippo-password
7. Create an unprivileged user to start Kippo and give him access to the folder.
root@kali: useradd -d /home/kippo -s /bin/bash -m kippo -g sudo
root@kali:/usr/local/src# chown -R kippo kippo-0.8/
8. Install the packages required for Kippo-Graph.
sudo apt-get update
sudo apt-get install libapache2-mod-php5 php5-cli php5-common php5-cgi php5-mysql php5-gd
9. Download Kippo-Graph
root@kali:/# wget http://bruteforce.gr/wp-content/uploads/kippo-graph-0.8.tar
root@kali:/# mv kippo-graph-0.8.tar /var/www/
root@kali:/var/www# tar xvf kippo-graph-0.8.tar --no-same-permissions
sudo /etc/init.d/apache2 restart
10. Start Kippo
root@kali:/usr/local/src/kippo-0.8# su kippo
kippo@kali:/usr/local/src/kippo-0.8# ./start.sh
With Kippo just installed, you need to publish the service in the Internet. By default, Kippo listens in the port 2222. You can publish it by setting a PAT, I mean, redirecting in your router the port 22 from the external IP to the port 2222 of the Kippo's internal (private) IP.
Looking at the graphs
To see the graphics, just get access to http://Raspberry-Pi_IP_Address/kippo-graph/
You will see these graphics:
- Top 10 passwords
- Top 10 usernames
- Top 10 user-pass combos
- Success ratio
- Successes per day/week
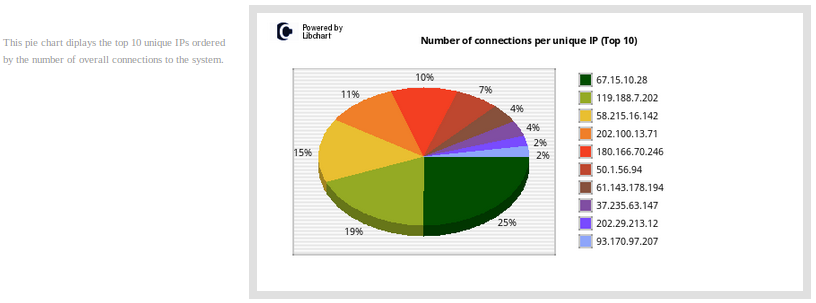
- Connections per IP for previous month
- Successful logins from the same IP
- Probes per day/week
- Top 10 SSH clients
- Human activity inside the honeypot
- Top 10 input (overall)
- Top 10 successful input
- Top 10 failed input
- passwd commands
- wget commands
- Executed scripts
- Interesting commands
- apt-get commands
- Top 10 IP addresses probing the system for previous month
- Total IP addresses probing the system per top 10 countries
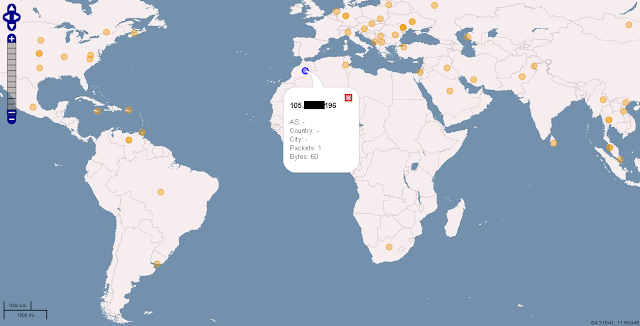
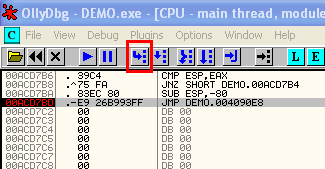
Some examples here:
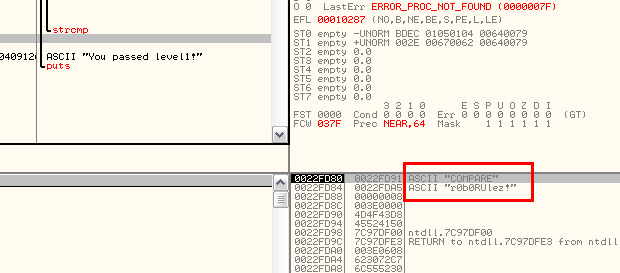
The best feature
In my opinion, the best Kippo feature is the capability of offering the attacker a fake filesystem and saving the commands which were executed by the intrusor just allowed to get access to the system when the "successful" attack was produced.
Here you can get several malware samples and new scripts created by hackers. You will have a great opportunity to learn new hacker trends!!!
In the file "/usr/local/src/kippo-0.8/data/userdb.txt" you can set the username/password "allowed" to get access to the fake system. You could set the password "root:0:root" or whatever you want to allow the hacker get access to.


.PNG)